When I am teaching a workshop, I am always asked about the process of making your own Encaustic Medium. I have decided to lay it all out for you here, so you can decide for yourself whether to invest in the process, or leave it to the professionals!
It’s really just a matter of deciding if you’ll be using great quantities, in which making your own would then be a good idea, and if you have the time and the interest. I personally love making Encaustic Medium. It warms me up to the play at hand; I find it relaxing…and you can’t beat the smell! Besides, I (and my students) would quickly go broke if I didn’t make it myself for my workshops. It really keeps the cost of an encaustic workshop down!
Ventilation (Use an exhaust fan above your work station. You might use a window box fan. But a box fan can be a bad idea for those of us who have actual winters!)
Here we go! Click on the first picture to get the full tutorial:
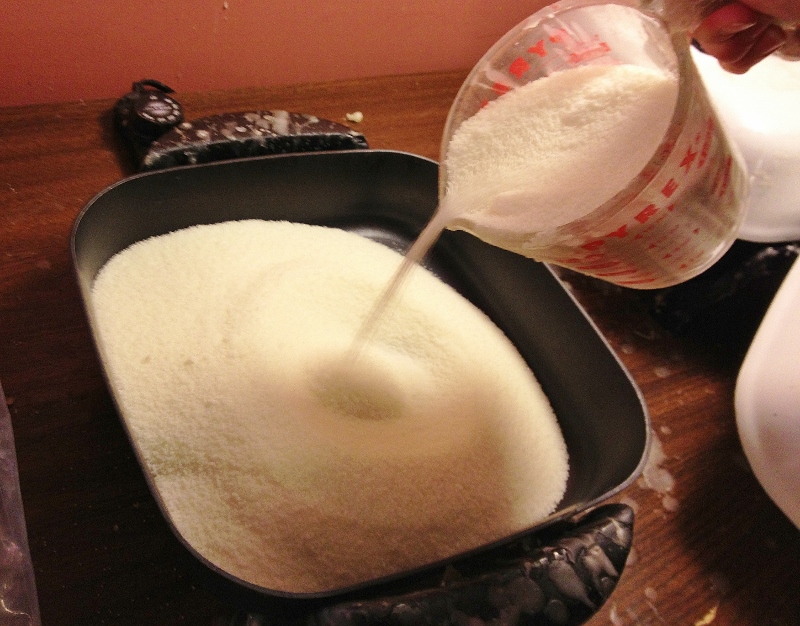
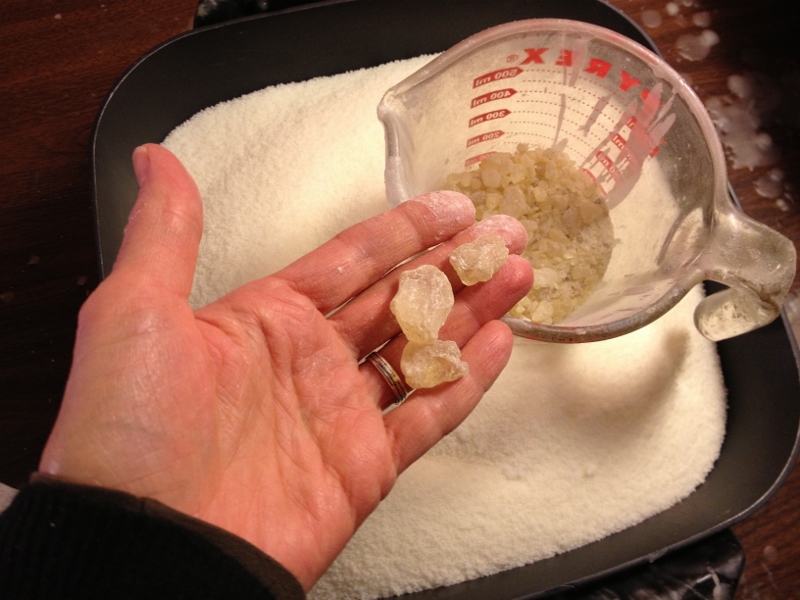
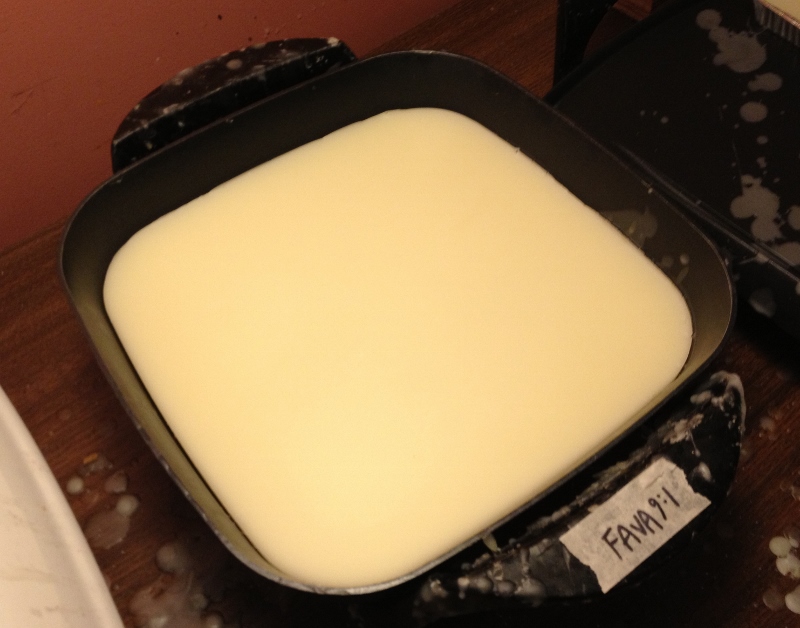
To make one skillet full of encaustic medium, put one skillet on “warm” and add as much beeswax as you like for the ratio you are looking for. I use a 5:1 beeswax/damar ratio for Encaustic Jewelry; I use 7:1 for Encaustic Casting; I use an 8:1 for Encaustic Painting; and I use a 9:1 for my digging/incising work.Add the Damar Resin Crystals.
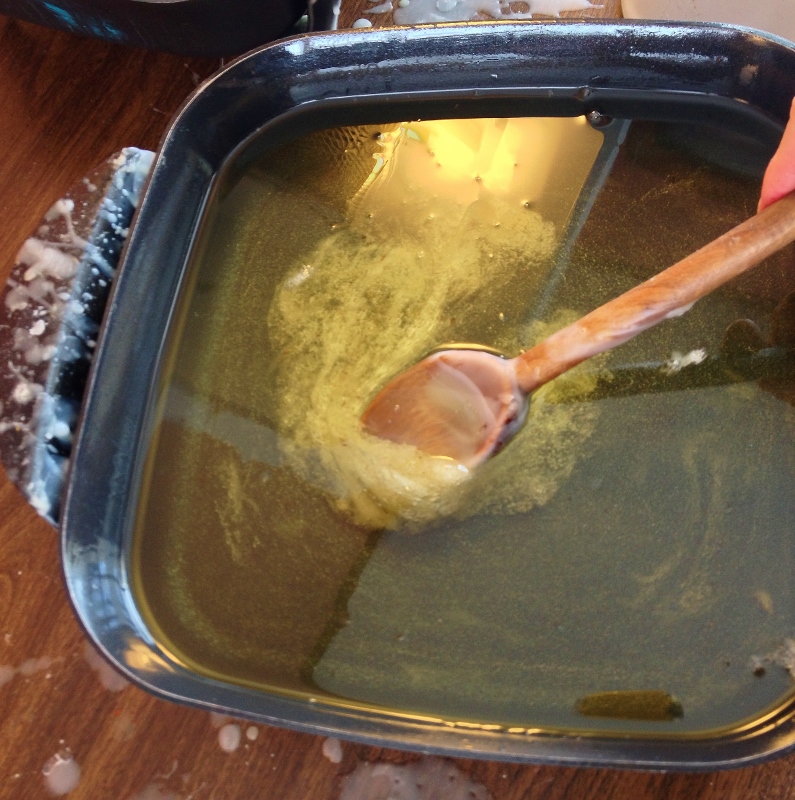
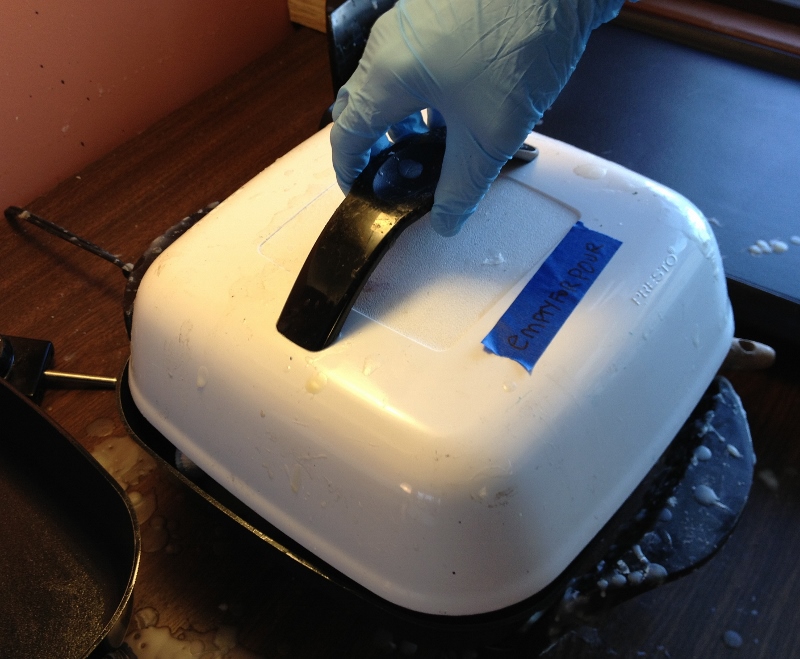
Cover you skillet and raise the temperature to 150* then after the beeswax melts, to 160*. This is my station. The medium I am making is in the center.Come back in an hour or so and check out the happenings. Looks like STIFF Taffy. It’s stuck to the bottom. Raise the temperature to 170* and leave it for a couple hours.Ah…much smoother….But not smooth or soft enough….Here’s where I spike the temperature to 200*.
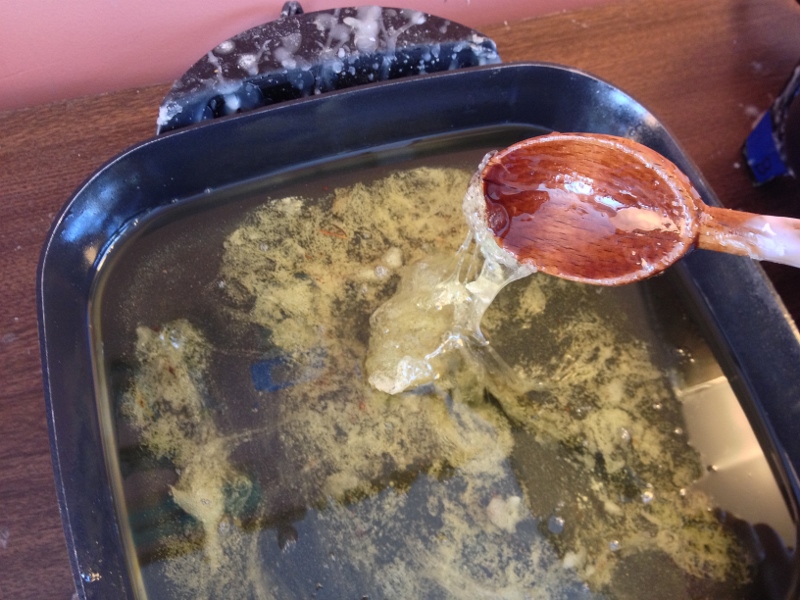
Stir it for a good while. There’s no way to get it to mix without stirring the dickens out of it.
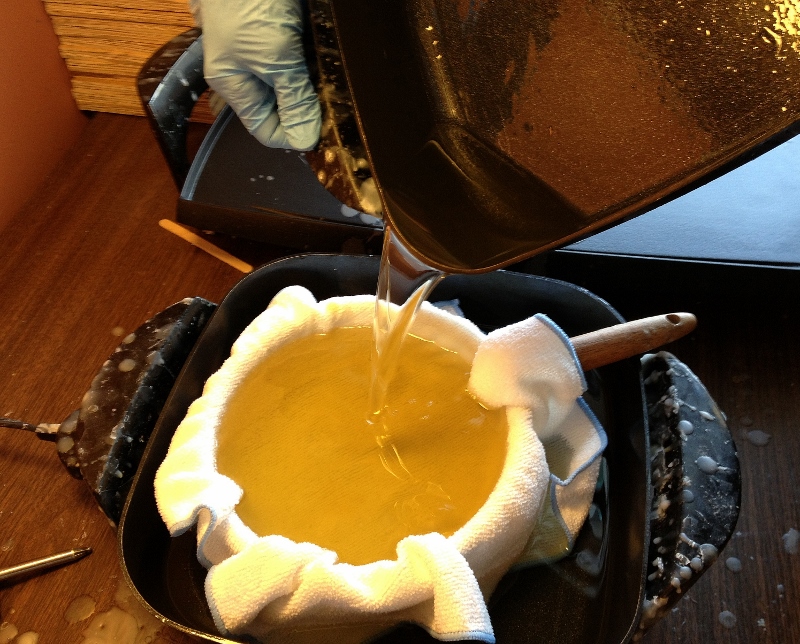
Meanwhile, warm your second skillet. Line your seive with the microfiber cloth and rubberband or masking tape it down on the handle and metal loop. Place it in the skillet and turn up the temperature to 150*. Put the lid on so its nice and cozy in there.
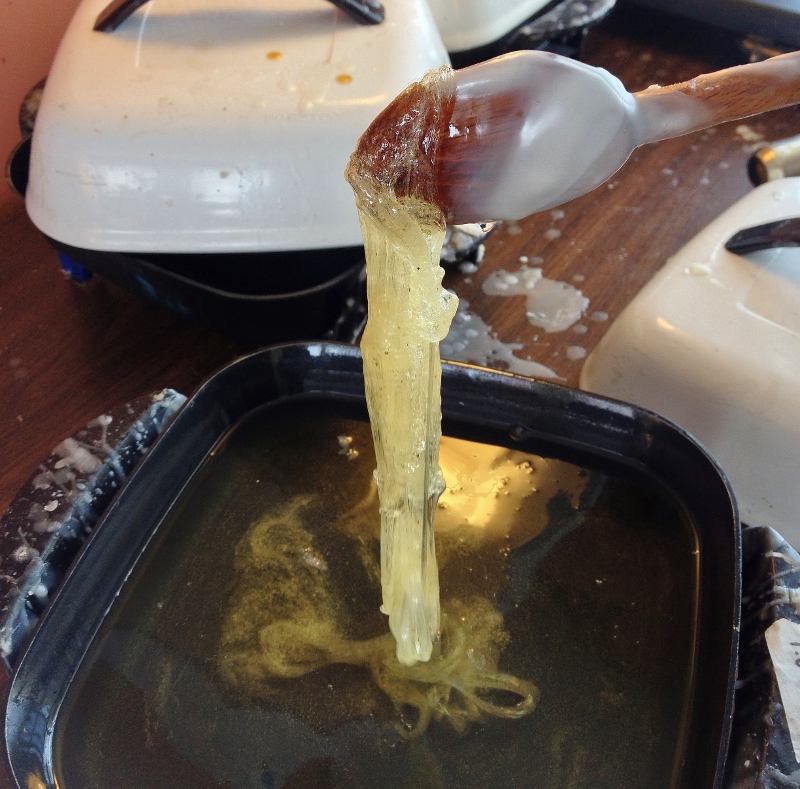
When your medium is nice and smooth in your first skillet, turn the skillet off and remove the temperature gauge. Now carefully, while wearing Nitrile gloves, pour the medium from the first skillet to the second. I pour from the corner as shown. Look, my entire pour went through at once! That’s the benefit of heating up your sieve. The warm medium slides right through.
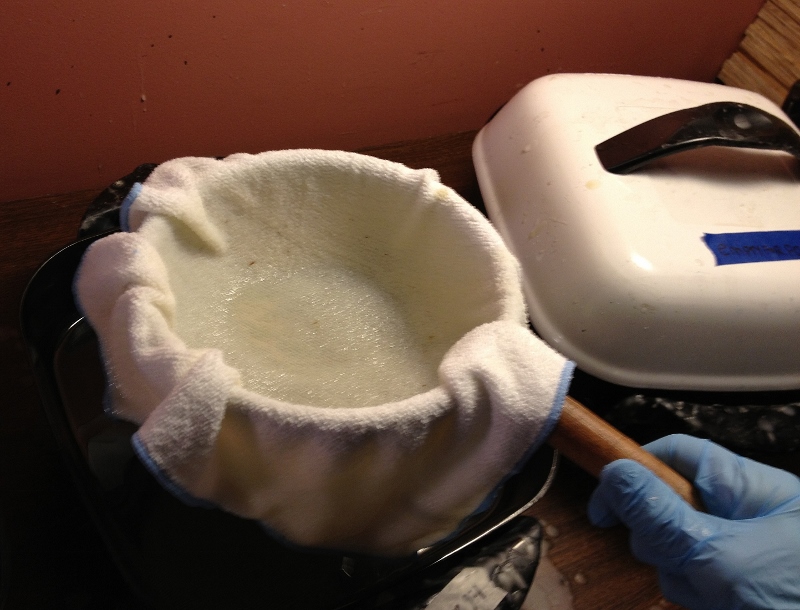
Cover this skillet and the sieve full of medium and let the medium drain through as much as possible. The medium will only drains halfway through the seive because of the height of the medium in the skillet. Therefore warm your first skillet back up by putting the gauge back in, and turning it to 180* (nice and hot to really drain that medium through the seive). Before you transfer the seive, wipe any residue out of the bottom…..
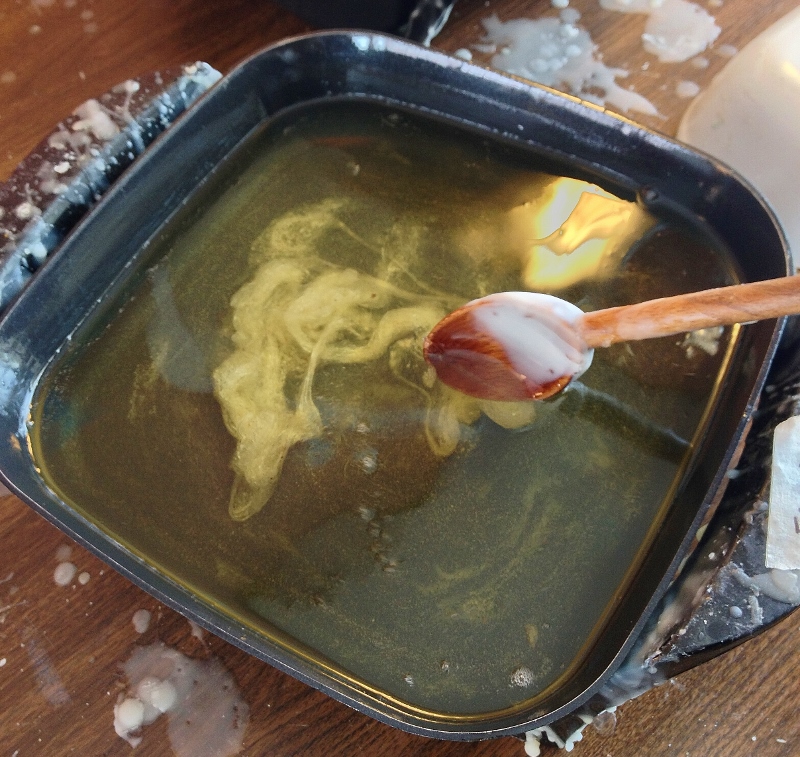
And now transfer the sieve over to the first skillet. This photo is of me pulling the sieve out of the second skillet after the last of the medium has drained.
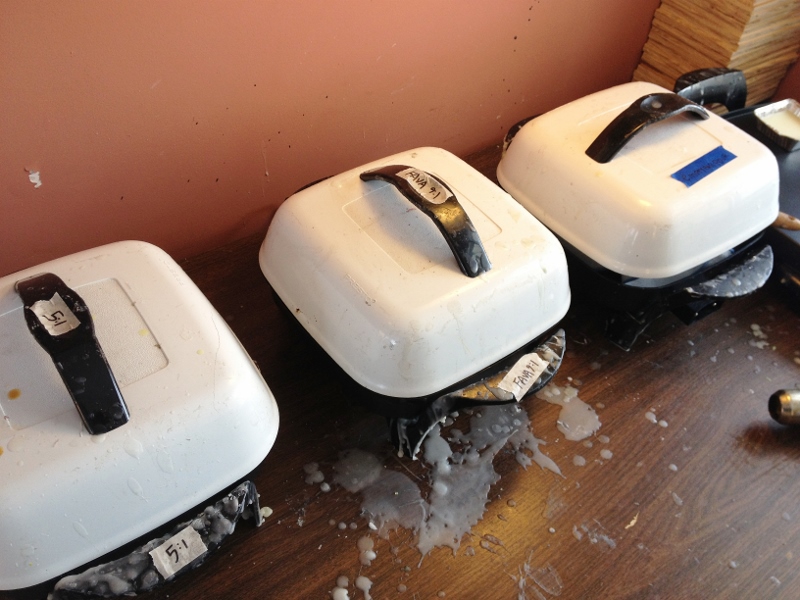
Lay your sieve down on Foil or a Silicone mat to wait on cleaning it, or to clean it immediately, pull the microfiber out of the sieve while it’s warm and place it right into the trash. You can re-use the sieve and cloth, but you’ll have to warm it well before the next round. But having placed it on foil or silicone, it will release itself back to you for storage. When I am making multiple batches, I use my silicone cake pan to pour batches into. But if you just make one batch, you can leave it in your skillet, ready to heat up in your next studio session or workshop. This batch serves about 6 students for one day.
I usually make two batches at a time in my three skillets, and it’s a bit like a juggling match, since you must always drain your wax through a warm seive into an empty, warm skillet. I do my last pour into a Silicon Cake Pan, let it cool, and then wrap, label and stack my beautiful slabs. I hope you enjoyed my tutorial! Maybe you’ll try making your own medium, now that you’ve seen the process.